How to Turn a Blog Post Into a Faceless YouTube Video
By Alex Stevens
By the end of this guide you will know exactly how to turn a blog post into a YouTube video using AI, without recording your voice, showing your face, or touching a video editor. You will have a finished, ready-to-upload MP4 that looks and sounds like a proper YouTube video. The whole process takes less than ten minutes once your post is written.
Why Blog-to-Video Is the Fastest Way to Get Your First Video Done
The hardest part of making a YouTube video is usually the script. When you already have a blog post, that work is done. Your research is done, your structure is done, and your key points are already written out. All you need to do is turn that writing into visuals and narration.
That is exactly what the Long-Form Video Maker inside Digital Maker AI does. You give it your script (or a topic, if you are on the Free plan), and it generates a scene image for every section, adds an AI narrator reading your words, burns in captions, and hands you a finished MP4. No camera, no microphone, no editing software.
If you want to understand what a faceless YouTube channel looks like in practice before you start, the faceless video overview at digitalmaker.ai/faceless is a good place to begin.
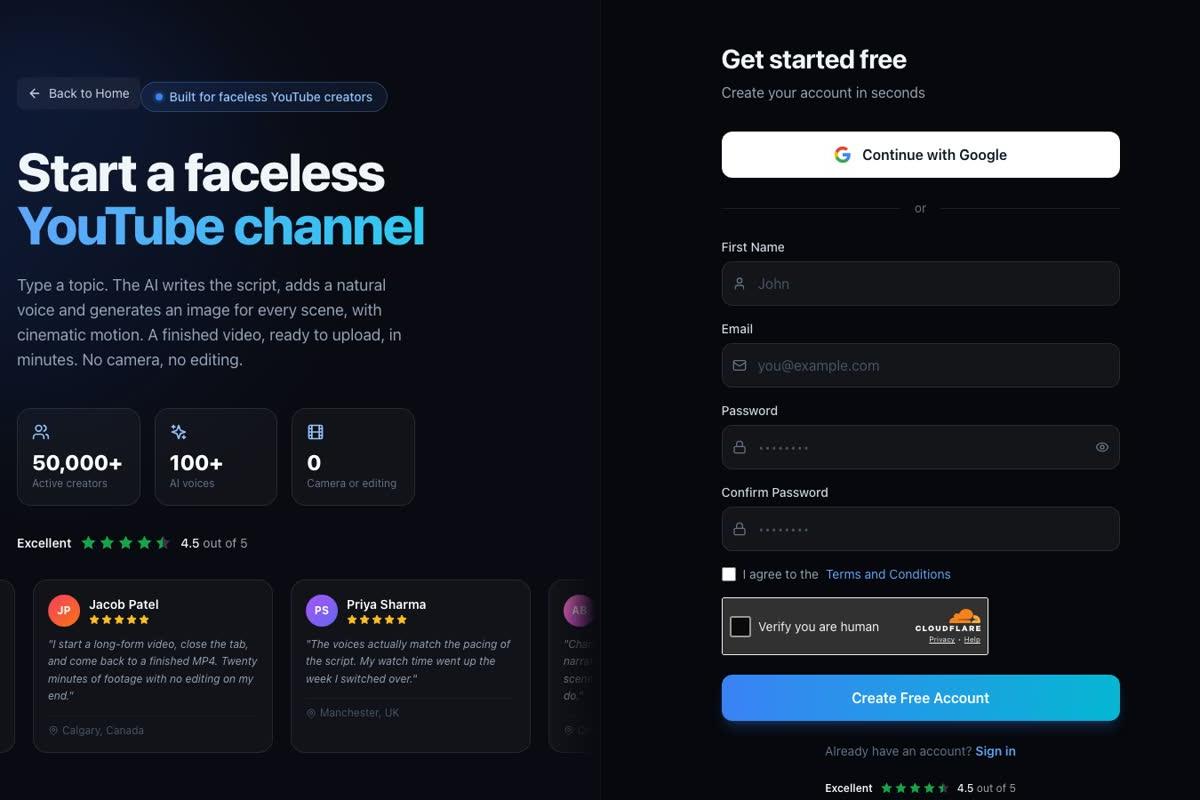
Step 1: Create Your Free Account
Go to digitalmaker.ai/faceless and sign up. No credit card is needed. The Free plan gives you five free videos, one of each type, and one of those is a long-form faceless video up to eight minutes long. That is more than enough to turn a typical blog post into your first YouTube video.
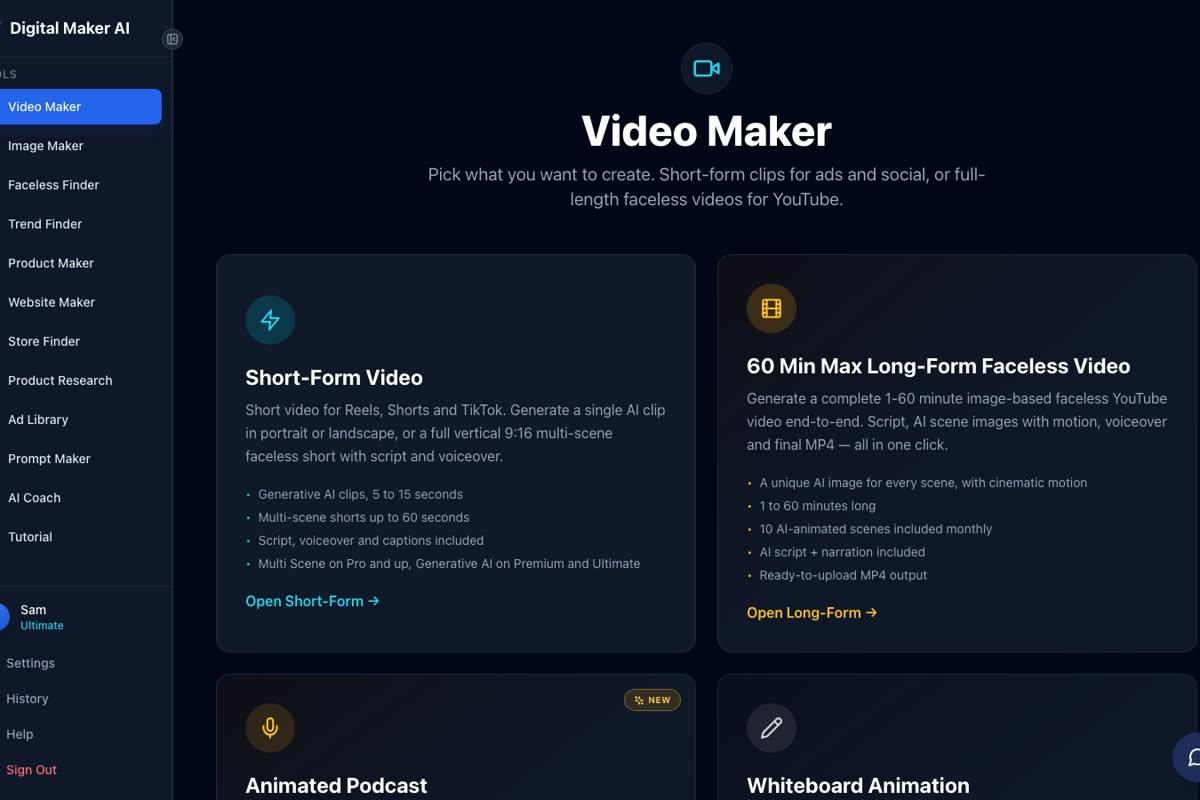
Step 2: Open the Video Maker
After signing in, look at the left sidebar and click Video Maker. This opens a screen showing your video type choices. Click the Long-Form Faceless Video card. This is the one built for YouTube: landscape 16:9, with a full script, scene images, voiceover and captions all generated for you.
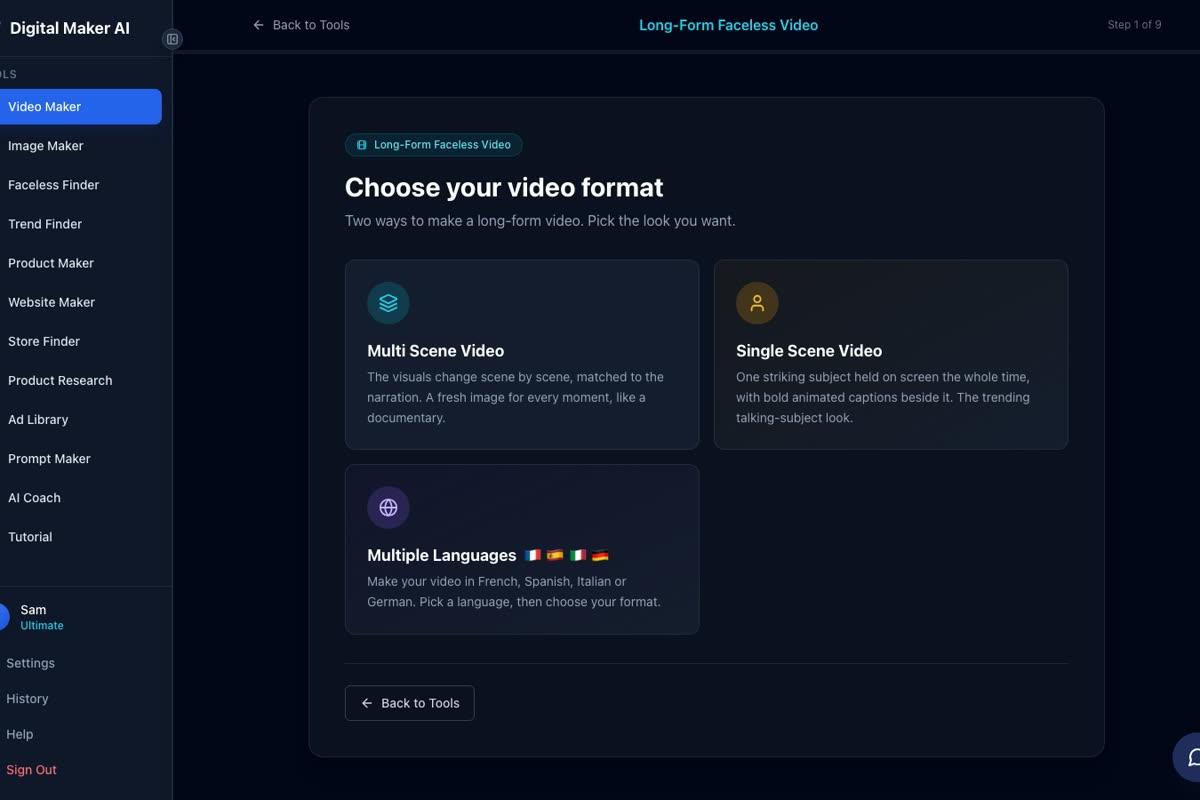
Step 3: Choose Multi Scene Format
The first screen inside the Long-Form maker asks you to pick a format. Choose Multi Scene Video. This gives every scene in your video its own AI-generated image, which is the best match for a blog post that covers several points or sections. Press Next.
Step 4: The Fork in the Road, Your Script or the AI's
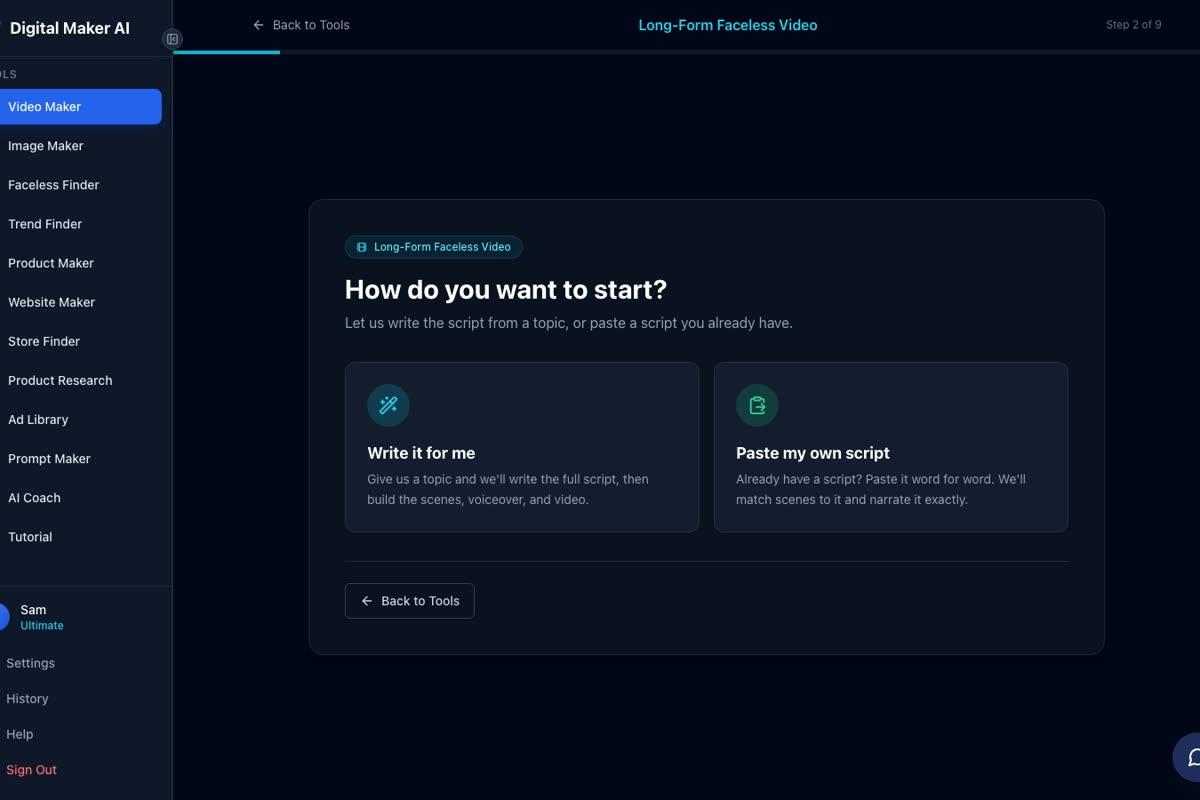
This is the most important step when you are repurposing a blog post. Step 2 of the maker asks: how do you want to start? You have two options.
- Paste my own script (paid plans): copy the text from your blog post, paste it straight in, and the AI uses your exact words as the narration. This is the cleanest way to turn a blog post into a video because your voice and your angle stay intact.
- Write it for me (all plans including Free): type a topic in one line and the AI writes a fresh script for you. On the Free plan this is the only option available, but it works well if your blog post is about one of the supported topic areas.
If you are on a paid plan, choose Paste my own script. Trim your blog post down to around 700 to 1,000 words for a five-minute video, or keep up to around 1,500 words for a ten-minute one. Remove any headings that would sound odd when read aloud, and break long paragraphs into shorter ones so the narrator has natural pauses.
Step 5: Type Your Topic (Free Plan Path)
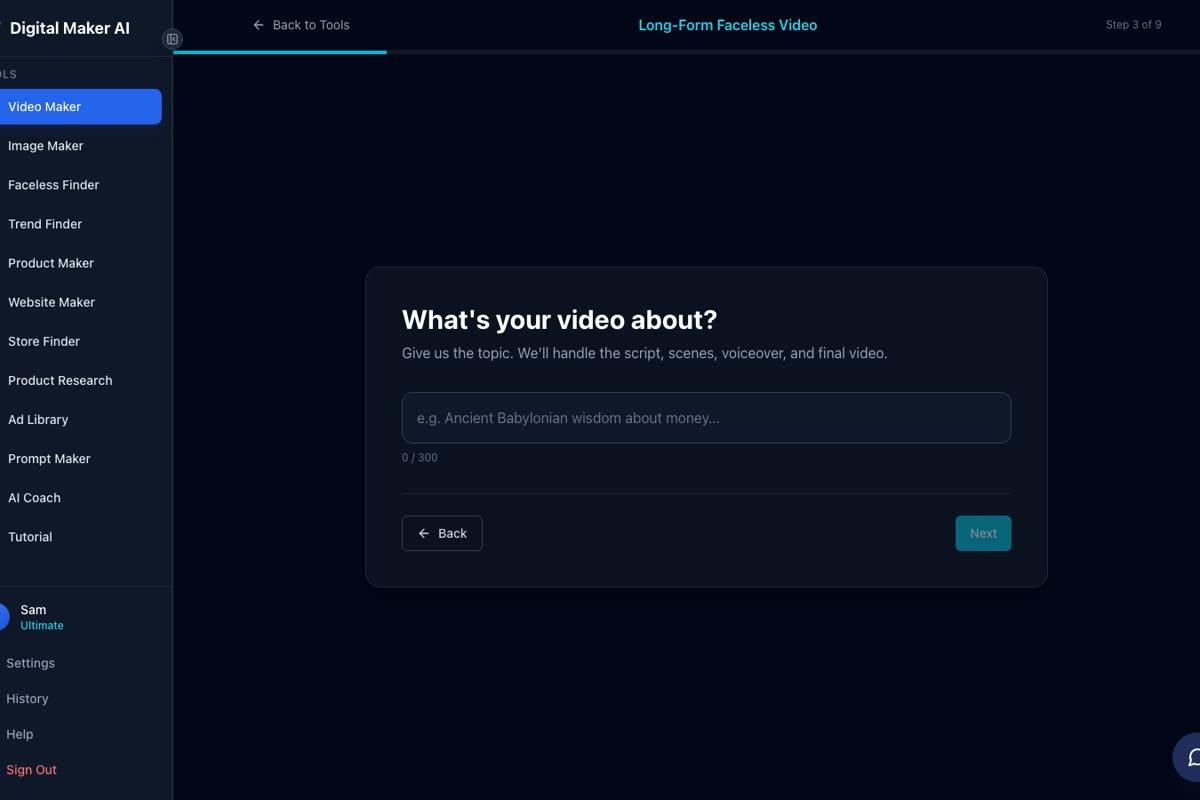
If you chose Write it for me, step 3 shows a single topic box. Type a one-line description of what your blog post is about. Keep it under 300 characters. The AI will write the full script, so think of this as giving it a headline rather than a summary. For example: Five money habits that separate savers from spenders.
On the Free plan, the topic needs to fit one of the supported areas: money and personal finance, business and side hustles, motivation, stoicism, law of attraction, history, ancient Egypt, the Roman Empire, true crime and mysteries, psychology, space, the deep sea, health and fitness, or faith. If your blog post is in one of those areas, you are all set.
Step 6: Pick a Visual Style
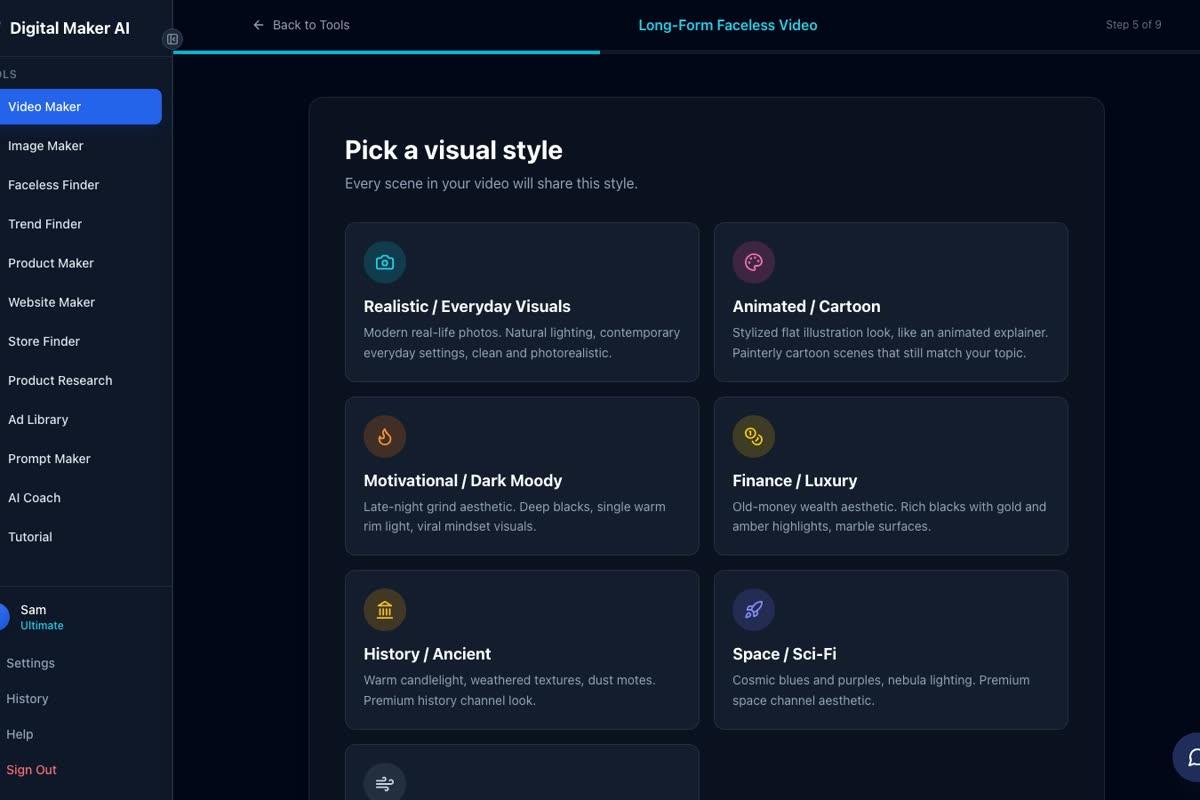
Step 5 of the maker asks you to choose a visual style. This controls how every scene image looks. For most blog content, two styles work best:
- Realistic or Everyday Visuals: photorealistic scenes that suit how-to posts, finance, health, business and lifestyle topics.
- Animated or Cartoon: illustrated, cartoon-looking still scenes that suit educational, motivational or story-based posts. Note that this style produces illustrated still images, not moving cartoon animation.
The other five styles (Motivational or Dark Moody, Finance or Luxury, History or Ancient, Space or Sci-Fi, Minimalist or Clean) are worth exploring once you know what your channel is about. Pick one style and every scene in the video will share it.
Step 7: Set the Right Length for Your Blog Post
A typical 1,000-word blog post reads aloud in about five to seven minutes at a comfortable pace. Set the length slider to 5 to 10 minutes for most posts. A five-minute video produces around 30 scenes, and the generator usually finishes in three to six minutes.
If you are on the Free plan, your free long-form video can be up to eight minutes. Paid plans unlock longer videos: up to ten minutes on Pro, thirty on Premium, and sixty on Ultimate. Check the pricing page for a full breakdown of what each plan includes.
Tip: shorter videos often perform better when you are just starting out. A tight five-minute video that covers one clear idea from your blog post will hold viewers better than a padded fifteen-minute one.
Step 8: Choose a Voice and Pacing
Step 7 lets you pick from a wide range of male and female AI narration voices. Listen to a few previews and choose one that matches the tone of your blog post. A calm, measured voice suits finance or health content. A warmer, faster voice suits motivational or story posts.
Step 8 sets the pacing: Calm, Standard or Energetic. Standard works for most blog-to-video conversions. If your post is dense with information, Calm gives listeners more time to absorb each point.
Step 9: Review and Generate
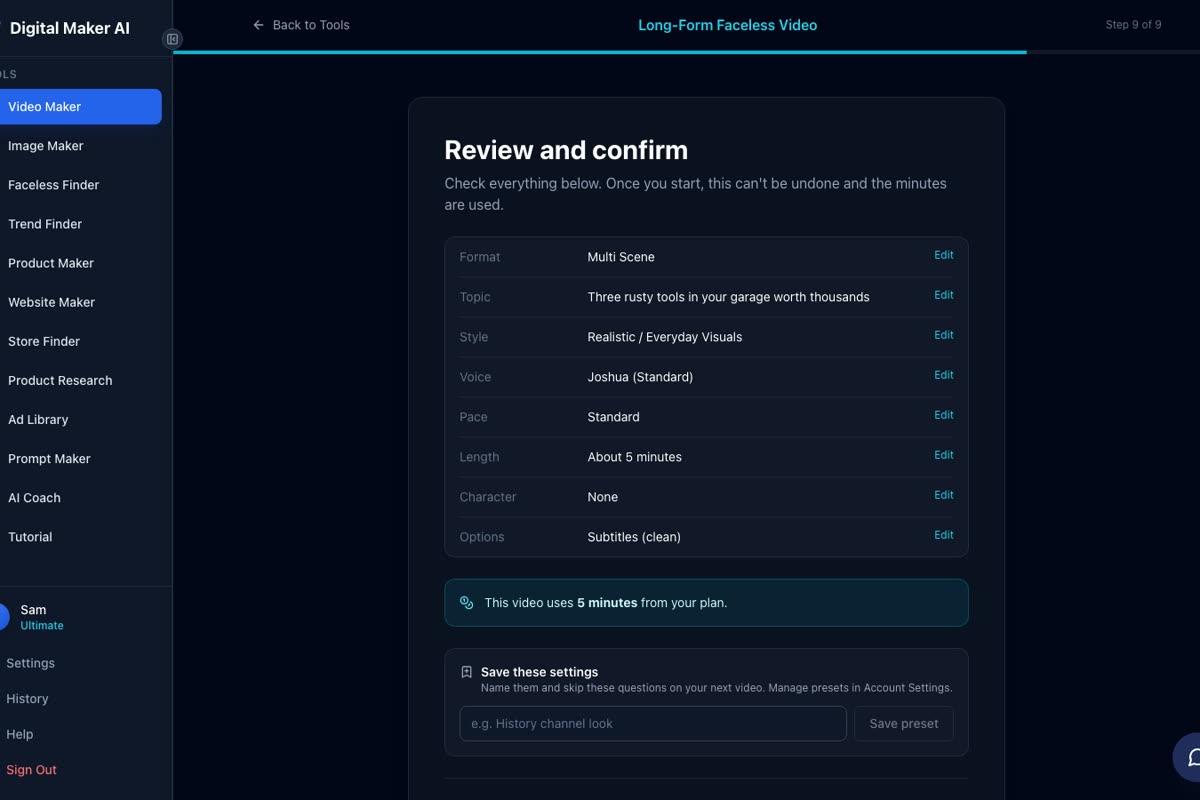
Step 9 shows a summary of everything you have chosen: format, topic or script, style, voice, pace, length and the number of minutes it will use from your plan. Read it through and check it matches what you want. When you are happy, press Generate Video.
The AI will write (or use) the script, generate a unique image for every scene, record the narration, add captions and assemble the MP4. This usually takes three to six minutes. You will see a progress bar while it works.
After the Video: Download and Upload to YouTube
When the video is ready you can watch it inside the app. If any scene image does not quite fit your post, you can regenerate it (each video comes with ten free regenerations), swap in your own image, or edit the narration text for that scene. There is no timeline editor to wrestle with: changes are made scene by scene.
Once you are happy, click Download to save the MP4 to your computer. Then go to YouTube Studio, click the upload button, and drag your MP4 in. Add the title and description from your original blog post, paste in your blog URL in the description, and publish.
On Premium and Ultimate plans you can also post straight to YouTube from the Post to socials button inside the app, which saves the download step entirely. Free and Pro users download the MP4 and upload it themselves.
One important note for Free plan users: your free video will carry a small Digital Maker AI watermark. Upgrading later removes it from that video. Commercial usage rights are included on every plan, including Free, so you can monetise the video on YouTube straight away.
Common Mistakes to Avoid When Turning a Blog Post Into a Video
- Pasting the whole post without editing it. Blog writing often has subheadings, bullet points and links that sound odd when read aloud. Clean up the text so it flows as spoken narration before you paste it in.
- Choosing a topic that is too broad. A post called "Everything About Personal Finance" is too vague. A post called "Three habits that help you save money every month" gives the AI a clear angle and produces a tighter video.
- Setting the length too long. A ten-minute video from a 600-word post will feel padded. Match the length to the word count: roughly five minutes per 700 to 800 words.
- Skipping the review step. Step 9 shows you exactly how many minutes the video will use from your plan. Check it before you press Generate so you are not surprised.
- Forgetting to add the blog link in the YouTube description. Your video can send traffic back to your full post. Always include the URL.
What to Do Next
Once you have your first blog-to-video live on YouTube, you have a workflow you can repeat for every post you have ever written. If you want to go further, you could also turn your blog content into short-form clips: read how to make a YouTube Short with AI in under ten minutes to see how the Short-Form Video maker works alongside the long-form one.
If you want to understand how to repurpose content across more formats, the free Digital Maker AI course walks you through the full platform step by step, including how to build a consistent faceless channel from the content you already have.
Alex Stevens: Alex Stevens writes for the Digital Maker AI team about faceless YouTube channels, AI presenters and AI video tools.