How to Use a Recurring Character in Your Faceless Videos
By Alex Stevens

By the end of this guide you will know exactly how to use a recurring character in faceless YouTube videos, from writing the character description all the way to attaching them to a finished video in Digital Maker AI. You will also have a set of practical habits that keep the character looking and feeling the same in every episode you publish, so your channel starts to feel like a real show rather than a random collection of clips.
Step 1: Understand What a Recurring Character Actually Does
A recurring character is a fictional person, mascot or illustrated figure who appears in every video on your channel. They are not a real presenter speaking to camera. They are drawn into the scene images by the AI, so they sit naturally inside each shot: behind a desk, standing in a room, walking through a landscape.
The reason this works so well is simple. When a viewer clicks on your second or third video and sees the same face they recognise from the first, their brain registers it as a show. That feeling of familiarity is what turns a one-time viewer into a subscriber. Think of any animated series you watched as a child: the character was the constant, and the topic changed each episode. The same logic applies to a faceless YouTube channel.
A strong recurring character also does quiet branding work. Viewers start to associate the look of the character with your niche. An elderly man in a blue suit at a tidy desk says "finance" before a single word of narration plays. A young woman in a minimalist white room says "productivity" or "wellness". The character becomes a visual shorthand for what your channel is about.
Recurring characters are available on the Premium and Ultimate plans inside Digital Maker AI. You can save up to ten characters in your account and reuse them across as many videos as you like.
Step 2: Write a Good Character Description
Before you open the app, spend five minutes writing your character description on paper or in a notes app. A good description covers four things: name, look, setting and personality. Getting this right before you build the image means the AI has everything it needs to draw a consistent character, and you have a reference to copy and paste every time you start a new video.
Name. Give the character a real first name. "Ellis" is easier to remember and reference than "the finance guy". The name does not have to appear on screen, but it anchors the character in your own mind and keeps your descriptions consistent.
Look. Describe age, build, hair, skin tone and clothing in plain language. Be specific: "a man in his late sixties, silver hair, warm brown skin, wearing a neat navy blue suit and gold-rimmed glasses" gives the AI far more to work with than "an old man in a suit". Include one or two distinctive details that will read clearly in a small thumbnail, such as the glasses or a colourful tie.
Setting. Describe where the character is usually found. "Seated at a mahogany desk in a tidy office with shelves of financial books behind him" is a setting. The setting will appear in most of your scene images, so pick one that matches your niche and looks good as a background.
Personality. Write two or three words: "calm, authoritative, warm". This does not change the image directly, but it helps you write consistent video topics and gives you a reference when you are describing the character to the AI later.
Here is a complete example you can adapt:
- Name: Ellis
- Look: A man in his late sixties, silver hair, warm brown skin, gold-rimmed glasses, navy blue suit, white shirt, no tie
- Setting: Seated at a mahogany desk in a well-lit office, shelves of financial books visible behind him
- Personality: Calm, knowledgeable, approachable
Step 3: Build and Save the Character Image in Digital Maker AI
Log in to your Digital Maker AI account and open the Image Maker from the left sidebar. Choose the Character image option. Paste your character description into the prompt field. Be as specific as you were in Step 2. Press generate and review the result.
If the first image is not quite right, tweak the description and try again. Pay attention to the face and the clothing, because those are the two elements the AI will try to match when it draws the character into your video scenes. When you are happy with the image, press Save as character, give it the character's name (Ellis, in our example) and confirm. The character is now stored in your account and ready to attach to any video.
You can save up to ten characters, so you could have one for a finance channel, one for a history channel and one for a wellness channel, all living in the same account.
Step 4: Start a New Long-Form Video and Pick Your Topic
Go to the Video Maker in the left sidebar and choose Long-Form Faceless Video. At Step 1, select Multi Scene as the format. Recurring characters work on Multi Scene videos. They are not available on Whiteboard Animation.
At Step 2, choose Write it for me so the AI writes the script from your topic. (Pasting your own script is also available on paid plans if you prefer.)
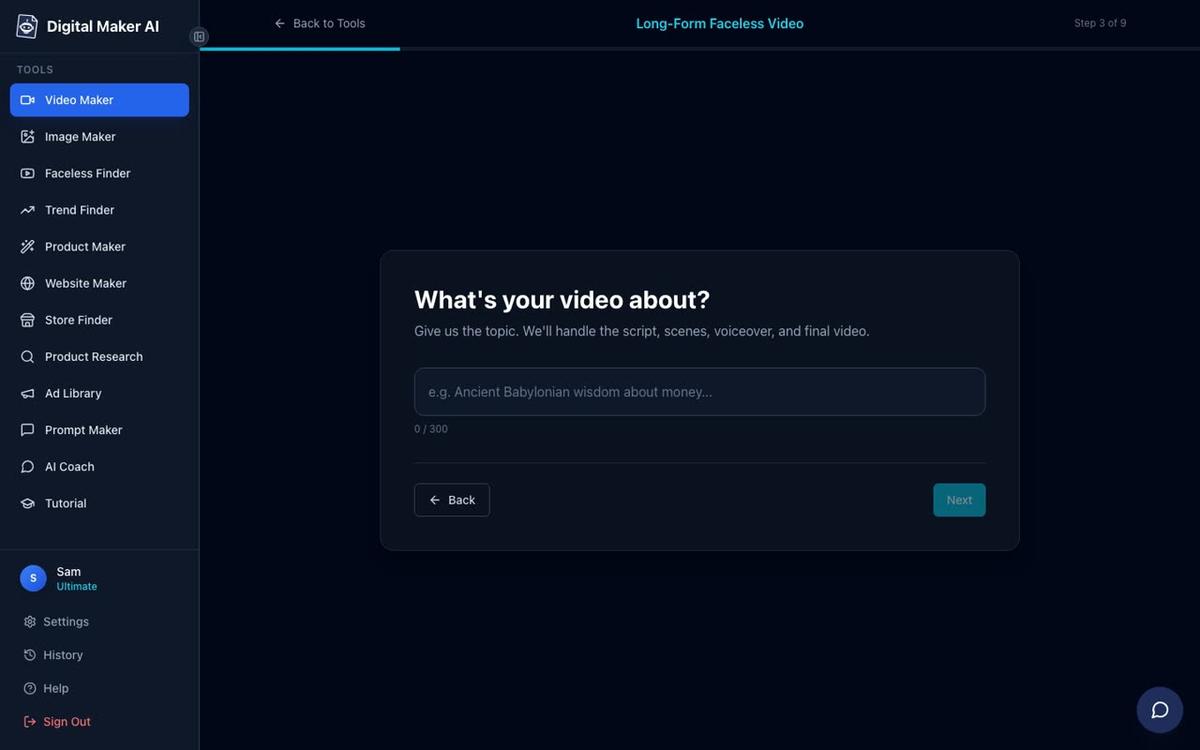
At Step 3, type your video topic into the topic box. Keep it to one clear sentence, for example: "Five money habits that separate the wealthy from everyone else." The AI will write the full script, generate a scene image for every scene and add narration, all from this one line.
Step 5: Pick the Visual Style That Matches Your Character
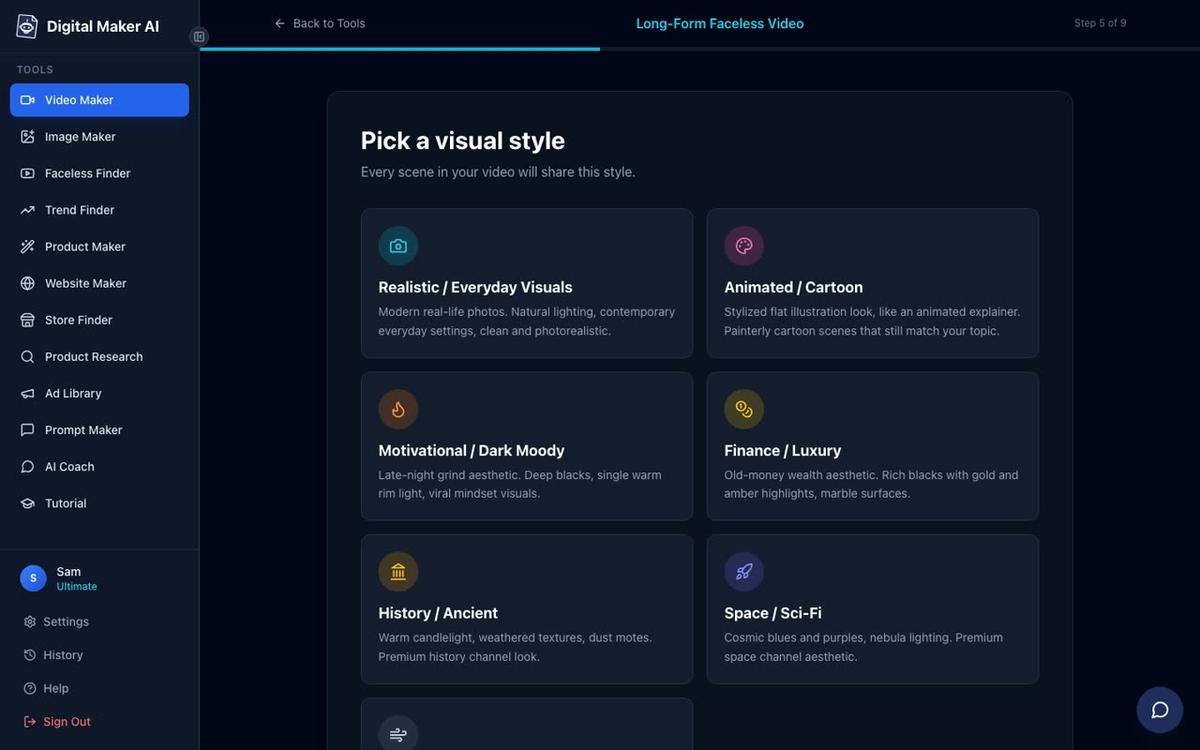
At Step 5 you choose a visual style. This is one of the most important decisions for a character-led channel, because every scene image in the video will be drawn in this style, including the scenes that feature your character. If the style does not match the character image you saved, the character will look out of place.
For a character like Ellis, the two best matches are Finance or Luxury and Animated or Cartoon. Finance or Luxury produces polished, high-end scenes with warm lighting and premium settings: ideal if your character is meant to feel authoritative and aspirational. Animated or Cartoon produces illustrated, cartoon-style still scenes: great if you want a friendlier, more accessible look that works well for educational or family-friendly content. Pick the same style every time you make a video featuring this character.
If you want to explore what an Animated or Cartoon style channel looks like in practice, the AI cartoon video generator page has examples of finished videos in that style.
Step 6: Attach Your Saved Character to the Video
As you move through the remaining steps (voice, length, pacing), you will reach the character selection step. This is where you attach Ellis, or whichever character you saved in Step 3, to this video. Select the character from your saved list and confirm.
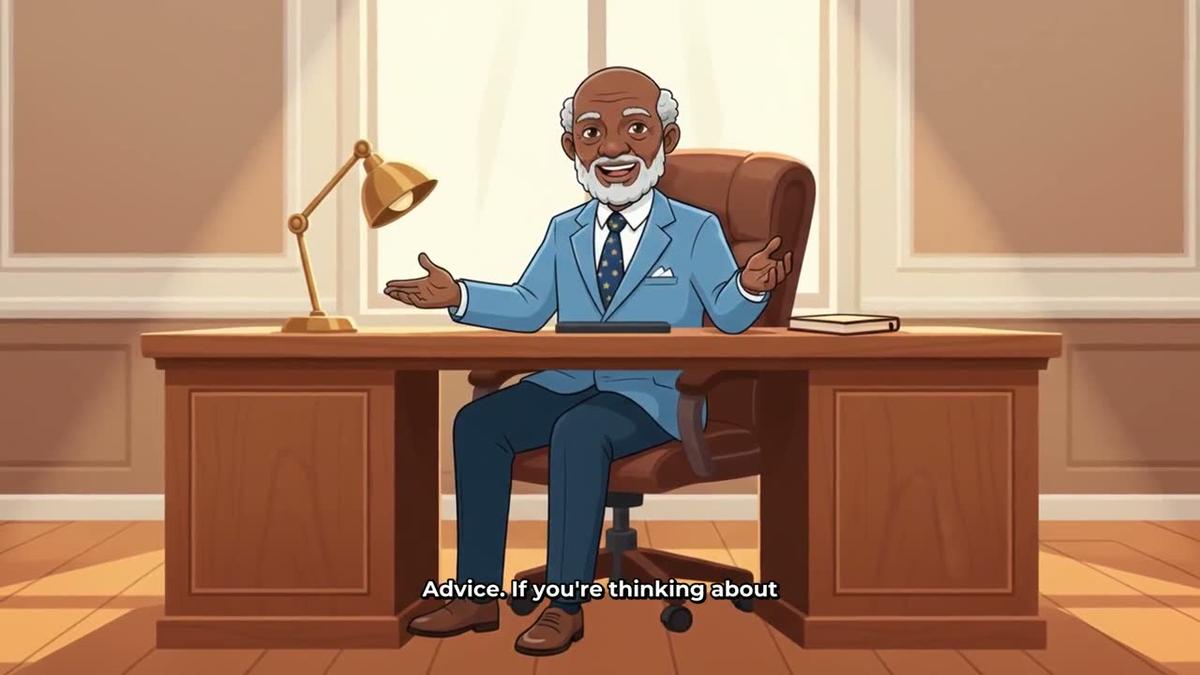
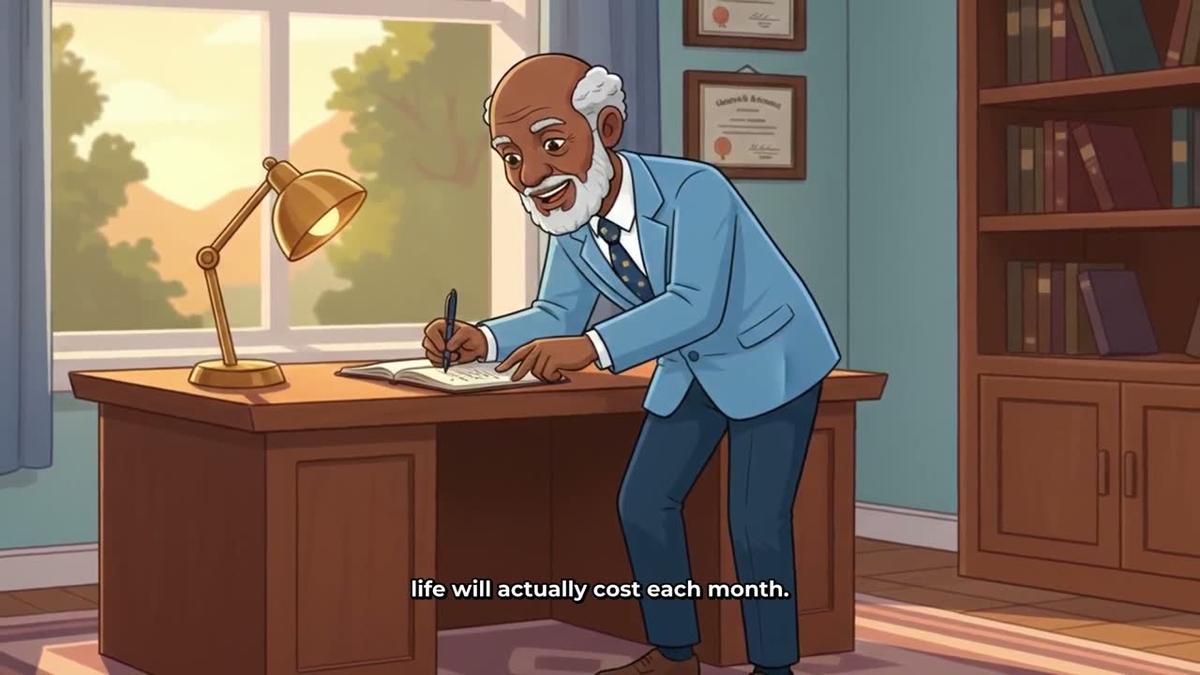
From this point on, every scene image the AI generates for this video will include your character. He will appear in different poses and positions across the scenes, but his face, clothing and overall look will stay consistent throughout. You do not need to do anything else: the AI handles the drawing.
Below you can see Ellis appearing in two different scenes of the same cartoon-style video. In the first he is seated at his desk. In the second he is standing in a different part of the office. The character is recognisably the same person in both shots.
At Step 9, the review screen, you will see "Character: Ellis" listed in the summary alongside the format, style, voice and length. This confirms the character is attached before you press Generate Video. You can also see exactly how many minutes the video will use from your plan.
Step 7: Keep the Character Consistent Across Episodes
Building the character once is the easy part. Keeping them consistent across ten, twenty or fifty episodes is where most creators slip up. Here are the habits that make the difference.
Always use the same saved character. Every time you start a new video, go to the character selection step and pick the same saved character. Do not describe the character again from scratch in the topic box or anywhere else. The saved image is the reference the AI uses, so as long as you select it, you are starting from a consistent base.
Always use the same visual style. If you chose Animated or Cartoon for Episode 1, use it for Episode 2 and every episode after. Mixing styles between episodes makes the character look like a different person, even if the saved image is the same. Lock in the style and do not change it.
Keep the same name in your saved character. If you ever need to update the character image slightly (for example to adjust the clothing), save the new version under the same name and delete the old one. This keeps your saved character list tidy and avoids confusion.
Use the reuse settings option. After your first video with Ellis, the app offers a "Same settings as last time" card at Step 4. This carries over your style, voice, pacing and length choices. It is a fast way to keep every episode feeling like it belongs to the same show.
For more ideas on building a channel that grows, the guide on how to get your first 1,000 YouTube subscribers with AI videos covers the publishing habits that help most.
Common Mistakes to Avoid When Using a Recurring Character
Changing the visual style mid-series. This is the single most common mistake. Switching from Animated or Cartoon to Realistic halfway through a series breaks the visual continuity completely. Viewers will notice, even if they cannot explain why. Pick a style and commit to it from Episode 1.
Writing a vague character description. "An old man in a suit" produces inconsistent results because it gives the AI almost nothing to lock onto. The more specific your description, the more reliably the AI reproduces the same face and clothing across scenes. Spend the extra two minutes on detail upfront.
Forgetting to attach the character. It is easy to rush through the steps and reach the review screen only to see "Character: none". Always check Step 9 before pressing Generate Video. If you see "none", go back and select your character.
Using a character on a Whiteboard Animation video. Recurring characters are not available on the Whiteboard format. If you want a character-led series, use Multi Scene.
Expecting the character to look identical in every single scene. The AI draws the character into each scene fresh, so there will be small natural variations in pose and angle. This is normal and actually makes the video feel more dynamic. What stays consistent is the face, the clothing and the overall style. That is enough for viewers to recognise the character immediately.
What to Do Next
You now have everything you need to know about how to use a recurring character in faceless YouTube videos. The practical steps are: write a detailed character description, build and save the character image in the Image Maker, start a long-form Multi Scene video, type your topic, pick the Finance or Luxury or Animated or Cartoon style, attach the saved character, and publish. Repeat the same steps for every episode, always selecting the same character and the same style.
If you want to go further, the consistent AI character video generator page shows more examples of what a character-led faceless channel looks like in practice, and explains how the feature works across different niches.
The best time to start is before your channel has any videos at all, because consistency from Episode 1 is far easier than retrofitting a character later. But even if you already have a few videos published, introducing a recurring character from your next episode is a meaningful upgrade. Viewers who find your older videos and then see the character in your newer ones will quickly understand that the channel has a consistent identity worth following.
Ready to build your first character? Start with the free Digital Maker AI course, which walks you through the whole video creation process from your first sign-in to your first published video, with the recurring character feature covered as part of the long-form workflow.
Alex Stevens: Alex Stevens writes for the Digital Maker AI team about faceless YouTube channels, AI presenters and AI video tools.